How To Effectively Use Bin Labels for Maximum Efficiency
Alex
11/9/2022
Hey everyone, welcome to the SKUSavvy blog, my name is Alex, and today we're going to talk about how you can lay out your bin locations within your warehouse in a way that's intuitive, easy to follow where you can grab any warehouse employee off the street, and bring them in and they just get it. I'm going to do this because we keep getting customers who reach out to us who have no idea how they're going to lay out their warehouse. As a result, it ends up taking us hours and hours to teach them how to do this, when in reality, it's a super simple concept. All you have to do is understand the structure. Once you understand the structure, you can apply that structure to your warehouse and you can finally label those bin locations and have accuracy when it comes to knowing what product is in what bin.
Why Does This Matter?
The advantages of having your warehouse efficiently laid out and labeled make their effects known throughout the whole process of warehouse management. At check-in, bin locations can be presented for other similar products to help you store new inventory in similar locations. When searching for product bin locations establish a known place for any given product. During cycle counting, you’ll use bin locations to determine what should be counted. And especially during picking, you can assemble picks in a more efficient manner using an efficient bin layout. Of course, with SKUSavvy inventory management, you get a visual layout of every bin within the warehouse to make this process even easier than before.

Warehouse Areas & Aisles
So up above, you are going to see what a traditional bin location label looks like. You'll see that it has five components normally, though on SKUSavvy we only utilize Shelf, Level, and bin because of the visual warehouse layout. The first one is the area. The second one is the row. The third one's the bay. The fourth one's a level. The fifth one is the bins, these are the position. So if we start with the simple bin locations here above, let's start with the area. The area (sometimes called zone) is designed to delineate or separate each physical section of the warehouse. So for instance, we've got customers that have three areas. Those areas are the refrigerator, the freezer, and the dry goods section. We've got other customers that own a set of warehouses and within that block of warehouses, a street separates each of the warehouses. So, that's they have three warehouses with three areas A, B, and C. So again, the area separates one section or one warehouse from the other. Now within every single warehouse in the world, you've got a set of aisles. And those aisles traditionally have a racking system of some kind on the left-hand side. And on the right-hand side well, guess what, when you look at that, think about it if you're in a supermarket, okay, you've got the canned goods here, and the rice on this line, for example, each of those sides is called a row to the left, if you're standing on aisle one would be row number one, and to the right would be row number two.

Warehouse Shelves, Bays & Bins
Within each row, you've got a set of bases, so a base is pretty straightforward. It's the column divided between one section of the row and the other. In SKUSavvy these could be set up as either a separate shelf, or you can simply use bins to delineate this. Now I'm gonna go ahead and show that above so you guys can see what that looks like. But you can see that it's just the metal beam, the space in between the metal beam and the other metal beam, that's called a bay. Now within the bay itself, you've got to set a level. Some distributors have two levels, others have five. Either way, each level works its way up from down below and goes from one all the way to five. For example, one being your picking floor, or the floor at the bottom of your bay, from what your employees are actually going to grab product from and pick. Now keep in mind, most distributors have it this way, this could vary. You could have distributors who pick from the floor below and the second floor. Depending on the size of your warehouse, you will specify which of these bin locations you pick from and which are overstock.
Bin Labels
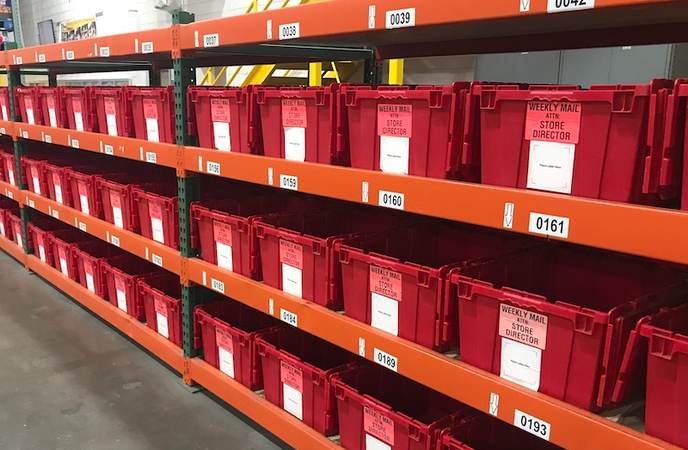
But anyway, within the bin location itself, here is the key to accurately labeling your bin locations. Within the bin location itself, you have bins. So let's say you're looking at a bay, you're looking at your level one, you've got a big space, let's say it's I don't know six feet by four feet high. Now within that space, let's say you have 10 little bins, little plastic containers where you put products inside (the only place product can be 'held' within SKUSavvy). So each one of those would be a bin location, they'd be numbered one through 10. We've got customers that normally have two bin locations within each bay on the level. That's because they've got two pallet positions, a pallet position on the left and a power position on the right. We've got other customers that sell lotions or makeup and things of that nature. And those customers, they've got multiple bins within that level in the bay. It's all up to the product that you sell. It's all up to how you want to lay out your warehouse. However you envision it being most efficient. That's how I want you to lay it out at the end of the day look, the most pragmatic way for me to say this is if you're going to have a bin, you must have an associated label for that bin. So that bin location must be labeled double. And it must be differentiated enough from the bin next to it in order to justify that label because you can't just have one big blob of space and then call this little square inch over here bin number one and this bin number two, etc. You actually need to have something separating one bin from the other. That way when your people are going to pick they can clearly see hey, this has been number one, okay in this level in this bay and this has been number two in this level in this bay. Within SKUSavvy each of your bins has a generated label for the bin so it can be printed out and applied to the position on your shelf. We've often seen the label printed out on a 4 x 2 magnetic label (or stuck to a magnetic label) so that it can be stuck to a shelf and easily moved around should you need to adjust the bin position.
Now, I'm not saying this necessarily is gonna apply to you, but it should give you an idea and get the wheels turning in your head as to how you can design these bin locations so that your pickers and your people checking products in are as efficient as possible. So hopefully this post helped you conceptualize how your bin locations are going to be laid out within your warehouse. If you have any questions for me or if you think that you have a better way of doing this, then be sure to reach out to us or show us your layout within SKUSavvy and we’ll feature any company that happens to come up with a super awesome way of dealing with your bin management.
People Also Ask
Do you need bin locations and why do they matter?
Bin locations are the precise spots where SKUs live; clear bin schema cuts walking and errors while boosting pick speed.
Shrinks search time and mis-picks
Enables accurate, real-time stock by bin
Powers optimized pick paths and replenishment
How do I set up bin locations in Shopify?
Use SKUSavvy to create bin locations using the 3D warehouse builder to lay out aisles, racks, shelves, and bins that mirror your floor. Syncs all inventory information back to Shopify.
Drag-and-drop layout; bulk create/edit bins
Set coordinates for routing and maps
Assign put-away rules for which products should go in each bin
What bin naming convention should I use?
Adopt a consistent code like Aisle-Rack-Shelf-Bin (e.g., A03-R02-S01-B05) so teams scan and read fast. You do not need to worry about bin naming so much with SKUSavvy because your bins are shown on a map.
Fixed-length segments for easy sorting
Avoid confusing chars (O/0, I/1)
Prefix zones (PCK, OVF, RSRV) for clarity
Create areas for QA, returns, or staging
How do I place SKUs to maximize pick speed?
Slot by velocity and size so fast movers sit near pack stations and at ergonomic heights. Utilize the warehouse heatmap to see which inventory items should be placed closer to the pack stations.
ABC analysis to rank demand
Give each top SKU a dedicated pick bin
Setup automated bin replenishments for top movers
Keep bulky/slow items higher or deeper
Can SKUSavvy optimize pick paths automatically?
Yes—SKUSavvy routes picks using bin coordinates to reduce backtracking and dead-ends while also improving the batching to reduce travel distance while getting more orders picked.
Batch/cluster picks by proximity
Pick-to-tote for multi-order runs
Real-time reroute if items move or stock out
How do I label bins for scanning?
Once bins are created in SKUSavvy each bin is automatically assigned a barcode and you can create a custom bin label. Print bin barcodes with the exact code you use in SKUSavvy and mount them consistently.
Place at eye/scan height, left-to-right
Consider printing or applying labels to magnetic labels
Use durable labels for dusty/cold areas
Verify every new bin with a quick scan
Can SKUSavvy direct putaway to the right bin?
Yes—guided putaway suggests bins based on matching product classifications such as tag, option values, SKU patterns or product types.
Prevents random stow and lost items
Honors bin capacity and restrictions
Records who/when/where for audit
What data should each bin store?
Store barcode, coordinates, capacity/dimensions, POS-only bins, pickable vs. non-pickable and allowed SKUs or hazards.
Max weight/qty to protect racking
Temperature/hazard notes if needed
Retail reconciliation classification
“Single-SKU pick bin” flag for speed
Which KPIs prove my bin layout is working?
Watch speed and accuracy trends before/after slotting changes. Track replenishments and compare specific pick batch timing before vs after.
Picks per hour & average pick path length
Mis-pick rate and order rework
Stockouts at pick bins vs. reserve level