Vendors
Learn how to adjust vendor items and prices, as well as purchase order workflow from platform to vendor.
Vendor Detail
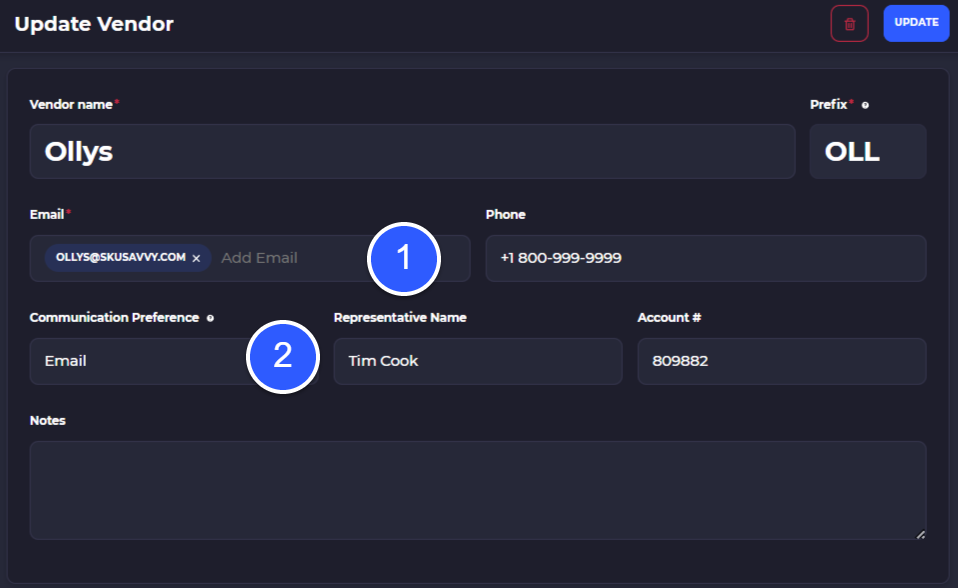
Every vendor within your SKUSavvy account can hold vendor details for sending purchase orders, preferred communication channels, location, and pricing information. Vendors are assigned which products they hold, and a price available to purchase the product from that vendor.
1) Each vendor accepts multiple emails
2) When email communication is turned on with the vendor, SKUSavvy will send your vendors an email with your PO and a portal they can
Vendor Shopify Import
When you connect SKUSavvy with your Shopify store the vendors and associated products will come over into SKUSavvy. You should aim to complete the vendor profiles within SKUSavvy. As you add new products and vendors on Shopify these will come over into SKUSavvy.
New vendor/product relationships added within SKUSavvy do not update to Shopify
Vendor Products
There are two ways to assign an item to a vendor, one from the vendor profile and again from the product itself. Within the vendor detail page, click on 'Items', here there is a way to add new products associated with the vendor. Add a product, and enter a cost for the product from that vendor. When you create a purchase order and select that vendor, the products associated will be the available options to buy from this vendor.
One product can be associated to multiple vendors at different costs
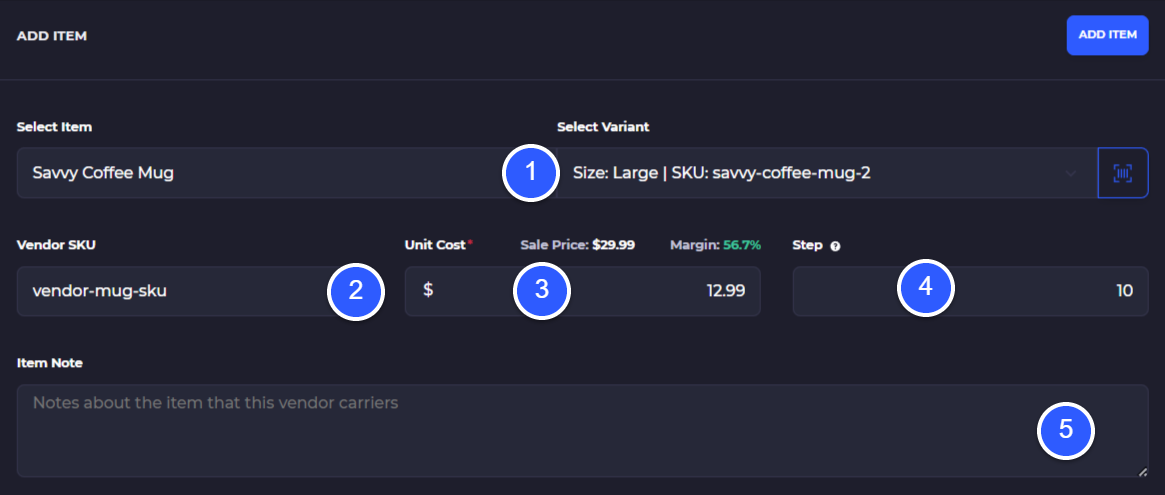
1) Select or scan the item you want to add to a vendor
2) Vendor SKU
3) Unit cost for the product from this vendor
4) Step rules, which is how many units must be purchased at a time from the vendor, so with a step count of 10, you can purchase 10, 20, 30 etc. units at a time from this vendor
5) Add notes for this item associated with the vendor - these notes will be shown during PO creation
Set Vendor Associations on the Product
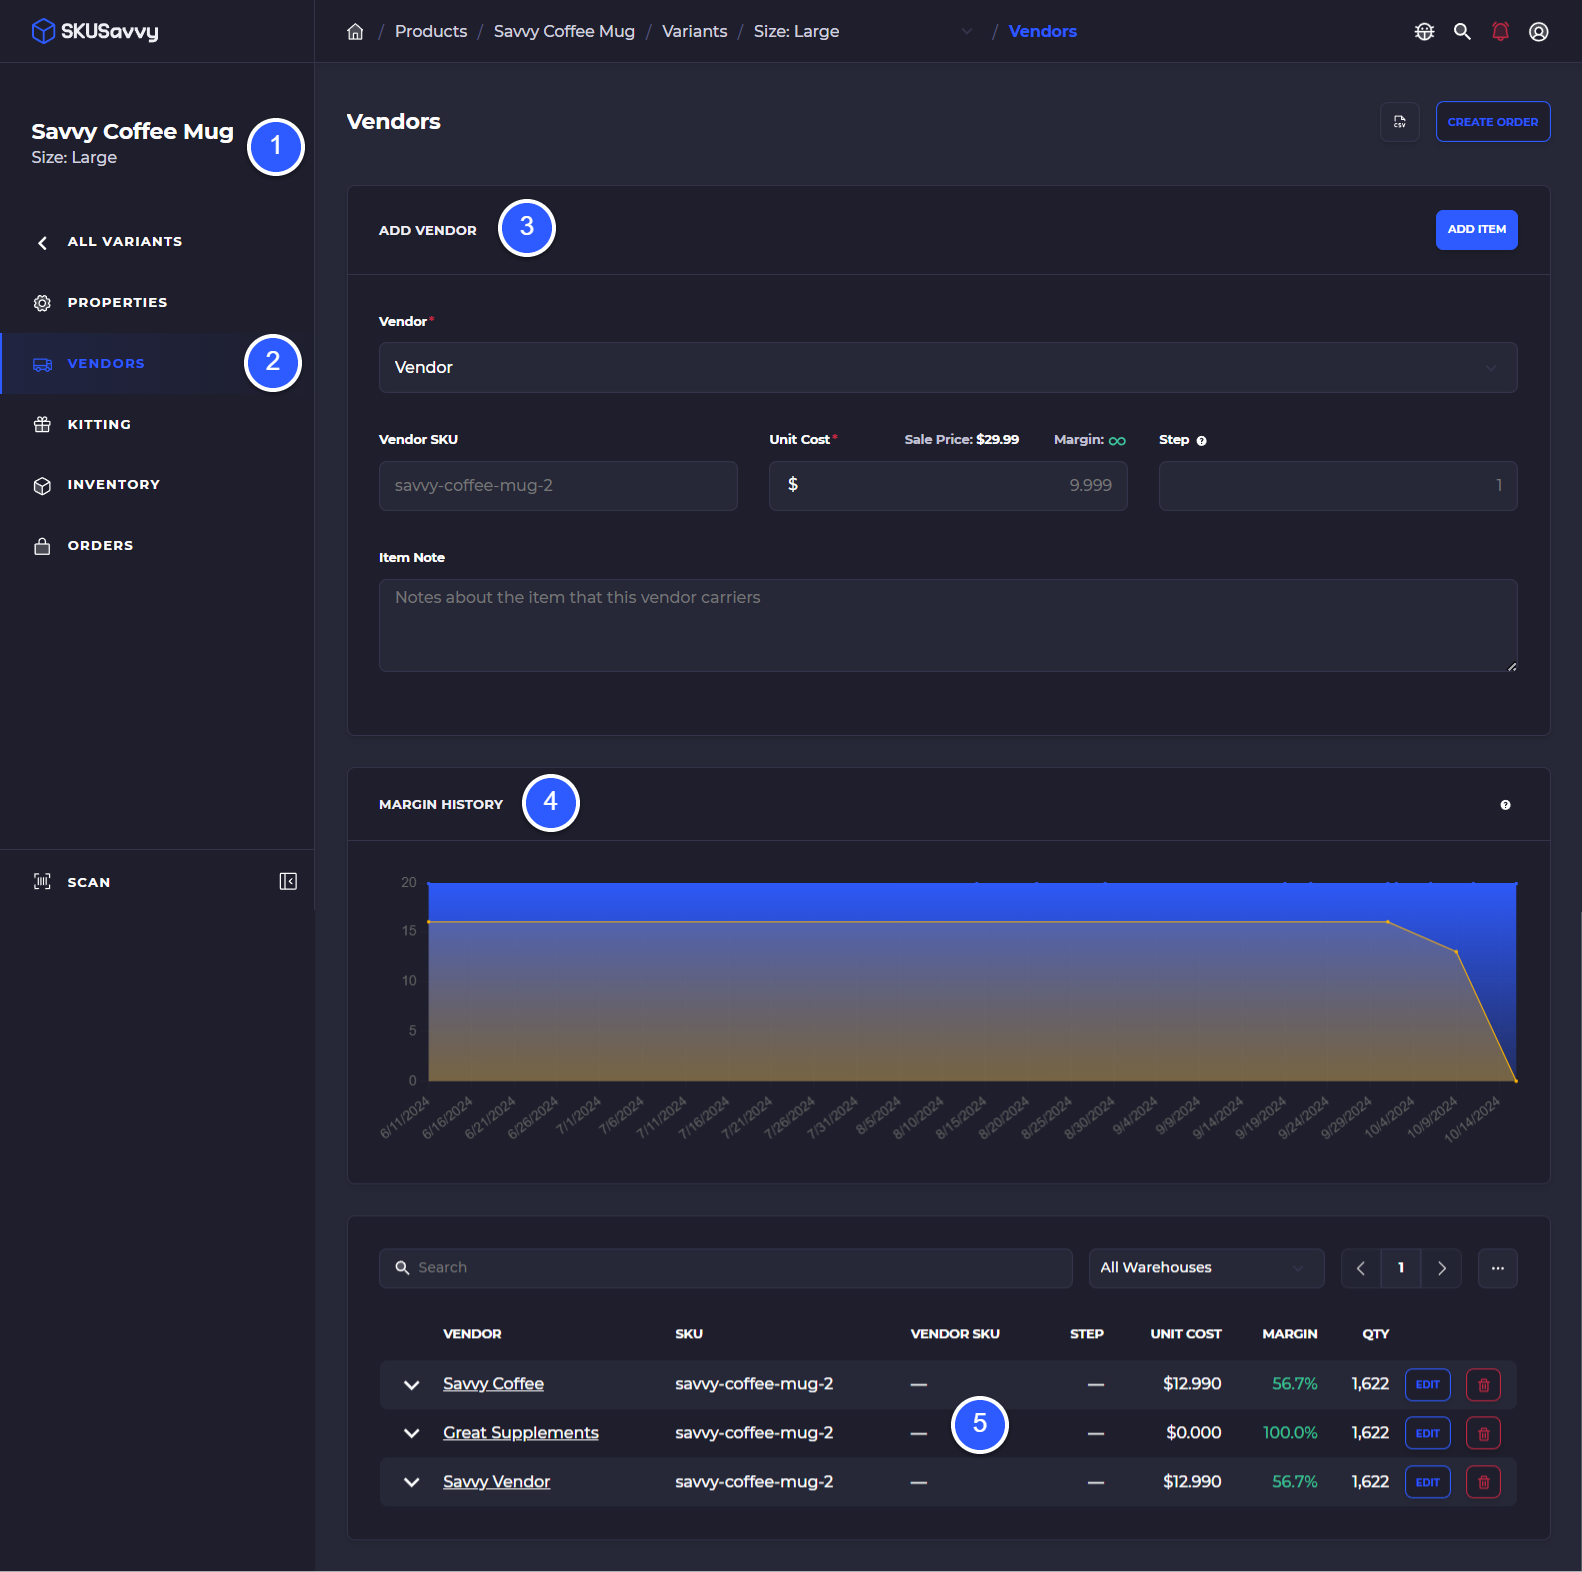
Within a product variant, you will see a whole section dedicated to vendors. From here you can select which vendors carry this product and at what price. This information will carry over to the vendor table. You can have more than one vendor association per product. On the purchasing of a product, you will select which vendor to purchase the product from. Here, you can compare products across different vendors when creating the purchase order taking into consideration lead times.
1) Select a product and variant
2) Choose vendors
3) Add a new vendor to the product, then enter costs, vendor SKU, step count
4) View margin history of the product over time, based on the last purchase of the product
5) View existing vendor associations, margin, costs on the product variant
Associate Vendors to Product in Bulk
If you haven't made product associations to vendors within Shopify or on SKUSavvy you can do so directly within the purchase order creation by simply adding a quantity to the PO, or using the import tool during PO creation which will create the association automatically.
Make Associations During PO Creation
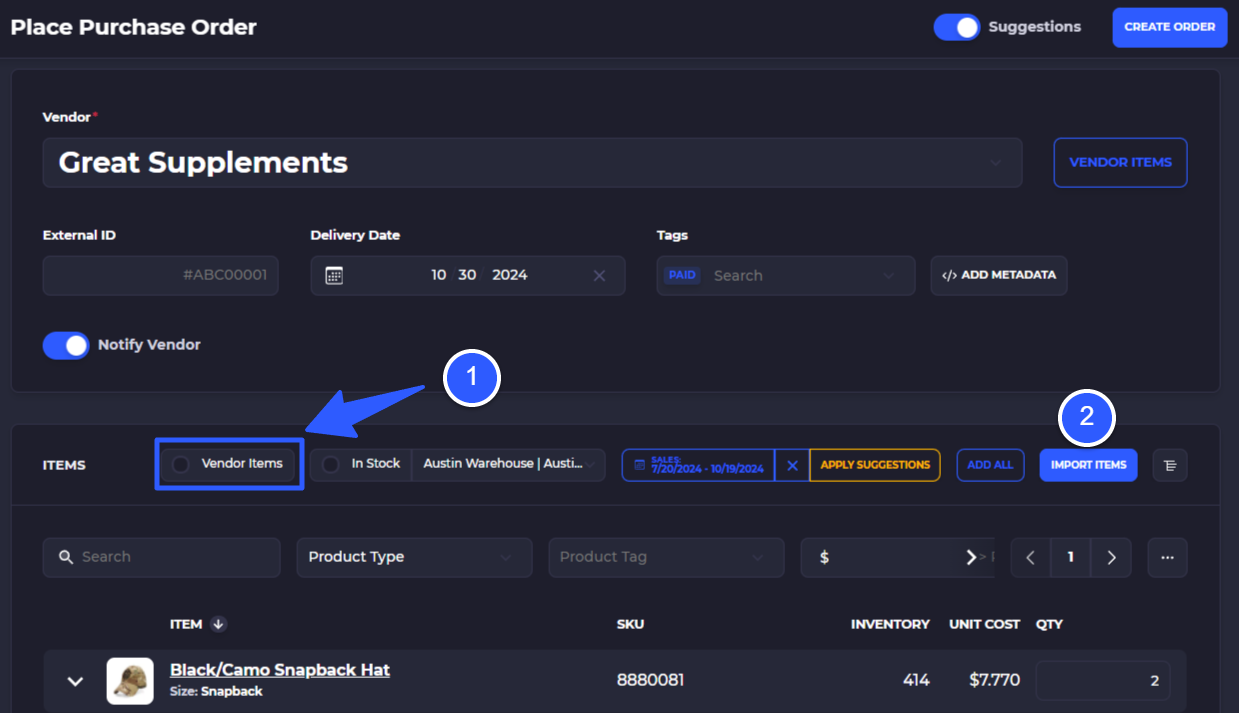
Simply begin creating a new purchase order then look for a checkbox titled 'Vendor Items' which when it is unchecked will show all products in your catalog. Adding an item to the PO will automatically associate that vendor to the item you've added quantity.
1) Uncheck 'Vendor Items' which will show the entire catalog so when a quantity is ordered from the vendor it will automatically make the association
2) Make associations with a CSV import
Vendor Purchase Orders
Purchase orders can be initiated anywhere you have your products and vendors available or from within your warehouses > inbound orders, or from within the vendor > orders section. Making the vendor selection will show all current products available for the vendor. Simply enter your quantity or filter by cost/price, tags, and add a quantity to all items matching your filters. You can also import purchase orders using a CSV. Visit the complete purchase order guide for more information.
Vendor Orders

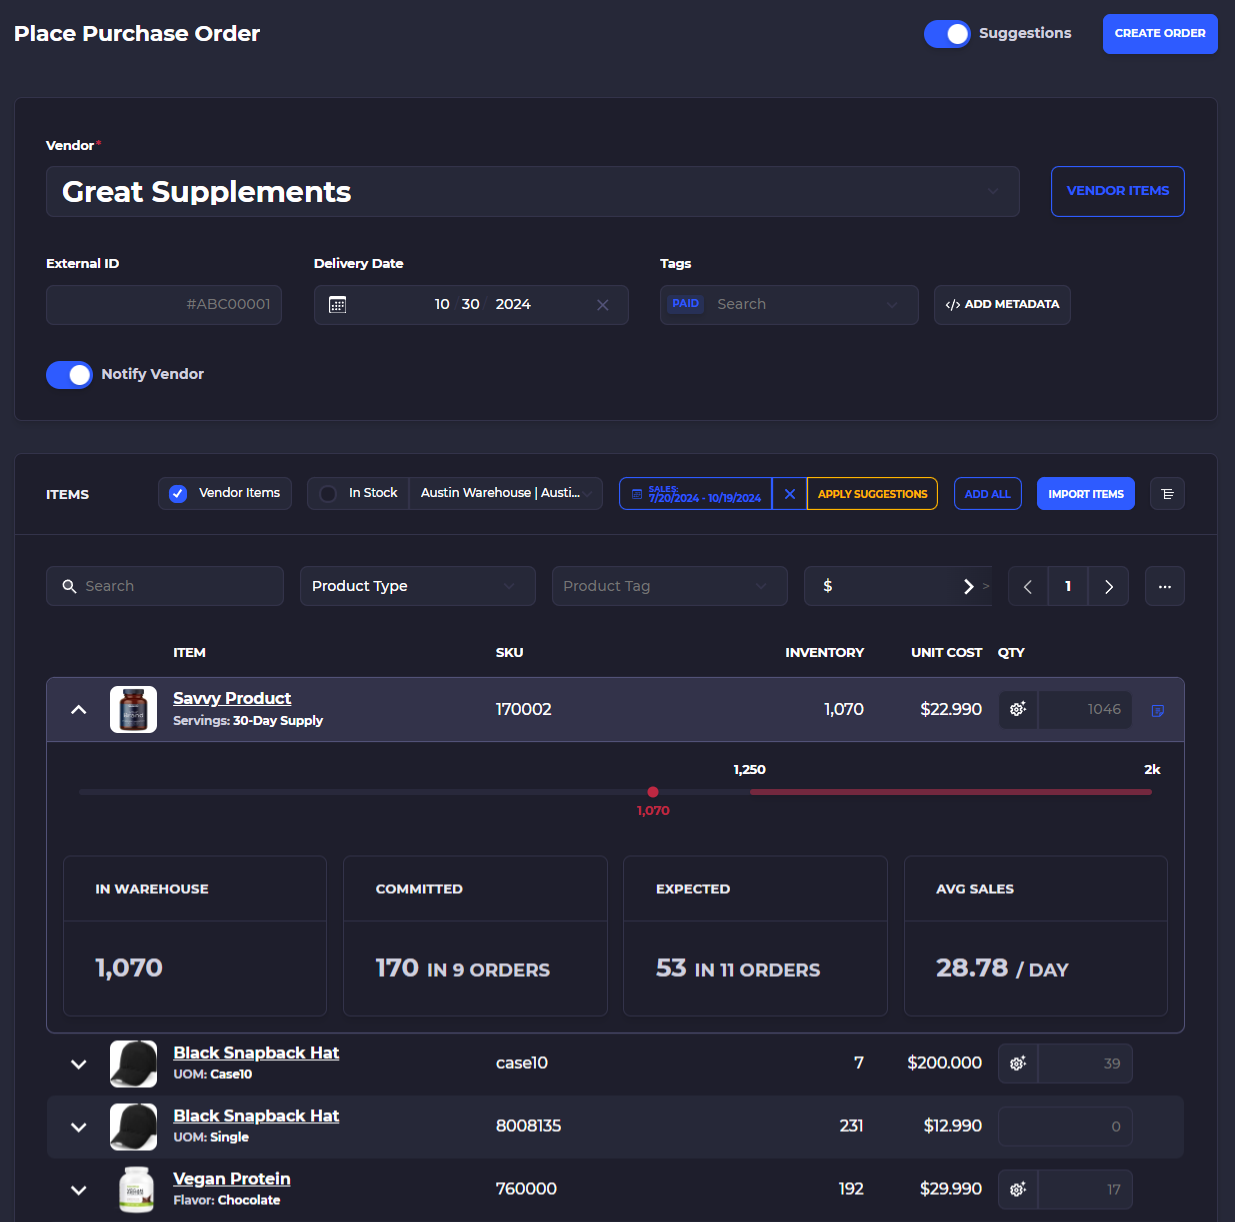
New Purchase Order Creation UI
PO Check-In
As a brief intro, once a purchase order has been placed and sent off to the vendor, it will be confirmed with the vendor by email, and then added to the queue for inbound orders. All inbound orders will have an attached invoice and available shipments to check in. Once the order arrives, a warehouse employee will go through the process of checking in a PO.
Select an inbound order
Scan shipment (can be a barcode on the shipment label or bill of lading etc.)
Assign shipment barcode or create new shipment
Scan item barcodes associated with the PO
Allocate items to a bin via scan