Shopify Connection
Learn how to connect SKUSavvy with your Shopify store to manage inventory, purchase orders, and pick-pack-ship products.
Connect Shopify App
Using SKUSavvy and Shopify together is the best way to fulfill more orders faster. By connecting your store you'll have the ability to sync up products, customers, orders, fulfillment status, and everything needed to successfully fulfill more orders faster.
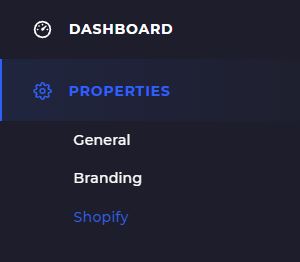
Watch a Video Tutorial on Connecting SKUSavvy with ShopifyTo get started, simply navigate to your company properties and click on Shopify. The system will ask for your Shopify store URL first, and then provide a series of permissions that need to be granted within the private app for it to work properly.
Add Store URL
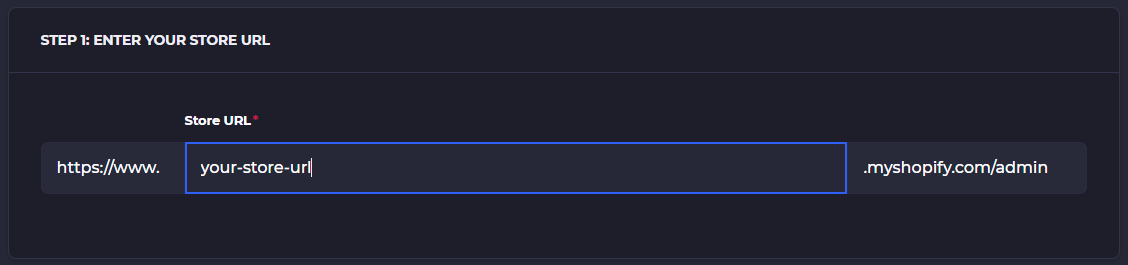
Once you've clicked into the Shopify connection in SKUSavvy, you'll first be prompted for your store URL.
To find your myShopify store URL, log in to your Shopify admin then at the top you will see the URL. It is shown in the format your-store-url.myshopify.com and for the purpose of adding the app to SKUSavvy, we are only concerned with the [your-store-url] part.

Now that you have your store URL you can enter it within the Shopify settings on SKUSavvy. Simply enter this value in, and proceed to the next step.
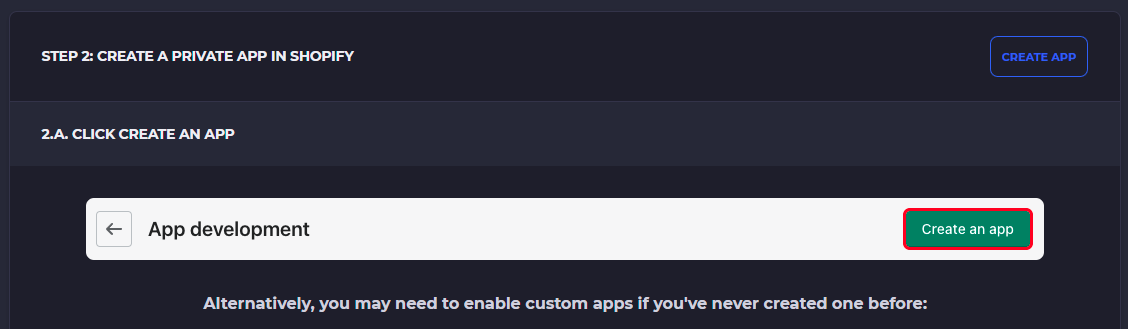
Create Private App
For Shopify and SKUSavvy to work together, you'll need to create a private app from the Shopify Apps page. This is similar to an app being available within the Shopify app store. In transparency, we wanted to get SKUSavvy close to perfection before launching on the app store. In addition, Shopify takes 15% of revenues over $1m.
Shopify Steps
Within your Shopify account click on 'Apps'. In the top bar click on 'Develop Apps' which will take you to create a new private app.

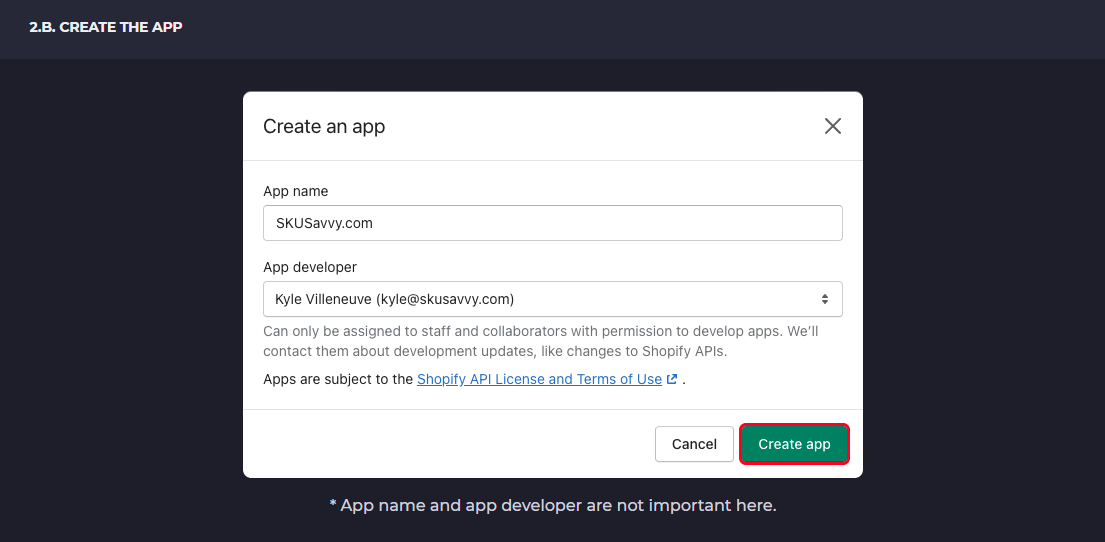
From the private apps screen click on 'Create An App' which will take you to a new page for adding an app name and URL as well as to set permissions for the app.

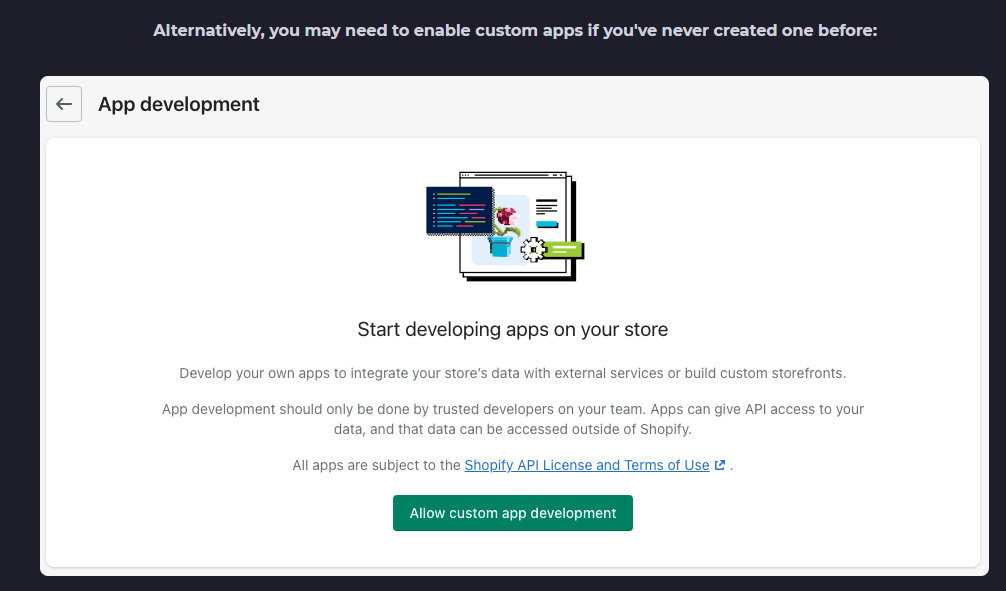
You might need to enable custom apps on your account if you haven't already. Do so by clicking on 'Allow Custom App Development'
Private App Details
When you create the new app you'll be prompted to enter a Private app name and a developer email address. Enter the following:
Private App Name: SKUSavvy.com
Emergency Developer Email: developers(at)skusavvy.com
Private App Permissions
The next step is to click on 'Show Inactive Admin API Permissions'
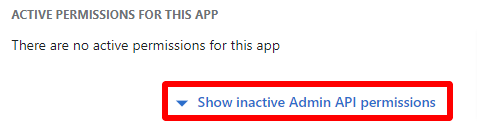
In the permissions available you need to set the following read/write access to the app. It's important to point out we are not holding, downloading, or otherwise outside of the sole use within your own SKUSavvy account.
read_assigned_fulfillment_orders
write_assigned_fulfillment_orders
read_customers
write_customers
read_fulfillments
write_fulfillments
read_inventory
read_locations
read_merchant_managed_fulfillment_orders
write_merchant_managed_fulfillment_orders
read_all_orders
read_order_edits
read_orders
write_orders
read_price_rules
read_product_listings
read_products
read_reports
read_returns
read_shipping
Just click save, and you'll have the new Shopify app set up and ready to use within SKUSavvy.

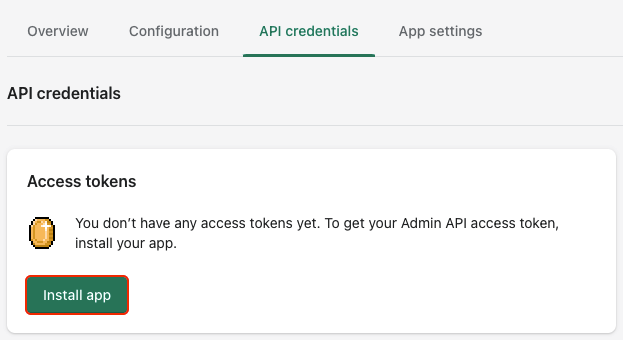
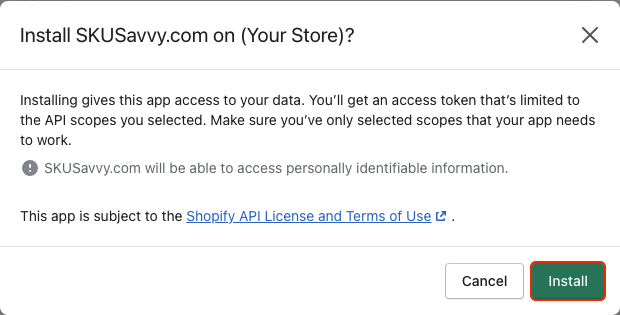
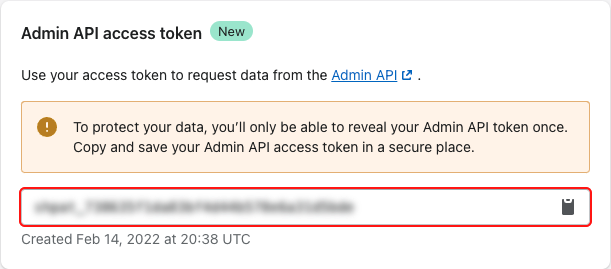
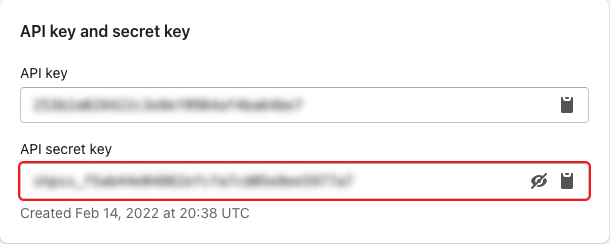
Create App and Add API Keys
Once you've set correct permissions for the private app, you'll click 'Install App' and get your API keys.
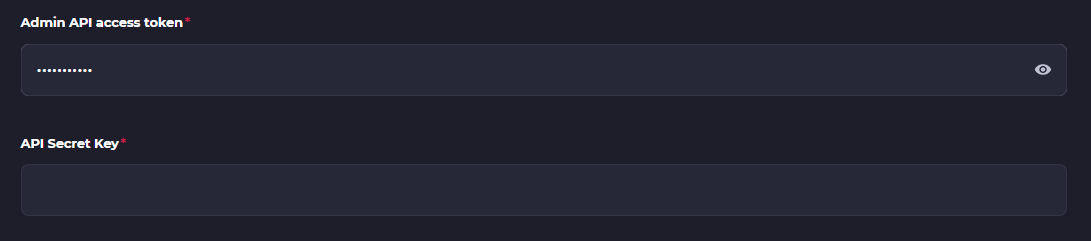
Enter Shopify Secret Key
Enter your Shopify secret key into SKUSavvy
Enter these values into SKUSavvy, and click submit, and you'll be well on your way.

Reuse Shopify Locations With Warehouses
In the very last step of connecting your Shopify store you'll have a place to connect the locations in your Shopify store with existing warehouses you've created in SKUSavvy.
