Shopify Inventory
Shopify inventory management within SKUSavvy will pull your current locations and inventory so all inventory is synced up.
Shopify Inventory Management
After you've connected your store you'll notice locations, products, vendors, inventory, customers, and orders start to flow into SKUSavvy. With this information, you can eventually replace any need for managing inventory within Shopify or any other app besides SKUSavvy for that matter. This guide will take you through adding Shopify inventory to your SKUSavvy bin locations.
Video Overview
Important to Note
Inventory Change Quantity
When inventory is updated on SKUSavvy, the quantity pushed up to Shopify is only the difference in quantity change, SKUSavvy does not override the inventory in Shopify
In this example, lets say you have Product A with 2 units in stock on Shopify and 0 units of Product A in stock on SKUSavvy - now you add 3 units on SKUSavvy, the total showing on Shopify will be 5 units because only the difference is pushed up (+3)
If you do a complete inventory override, the values are manually adjusted by the difference of whichever platform you are overriding from
This applies to all inventory changes that take place including adjustments, order fulfillments, transfers, PO check-in, cycle counts
Uploading Inventory to shopify
White it is advised not to do this, you can still upload inventory to Shopify. You MUST resync the inventory via manual override from Shopify into SKUSavvy for this inventory to appear.
Inventory changes brought in via manual override will create location assignments for that inventory which must be placed into a SKUSavvy bin location
You can only do a manual override once in a 12-hour period
Connect Shopify Inventory
The first step to getting inventory flowing between Shopify and SKUSavvy is to connect your store. Follow the guide below or go directly into your account > Shopify to follow the steps.
Resync Shopify Inventory
You can resync your inventory from Shopify into SKUSavvy or from SKUSavvy into Shopify. Depending on the origin for your resync this will send up an override of the inventory from one system to another.
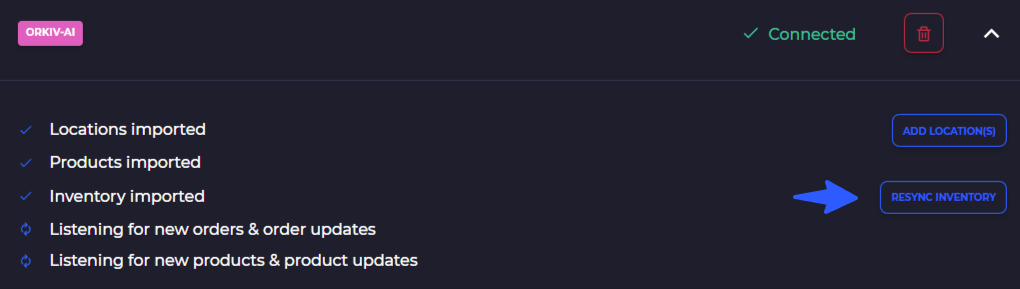
Next, select which direction you want to sync from/to and indicate which location(s) you want to resync.
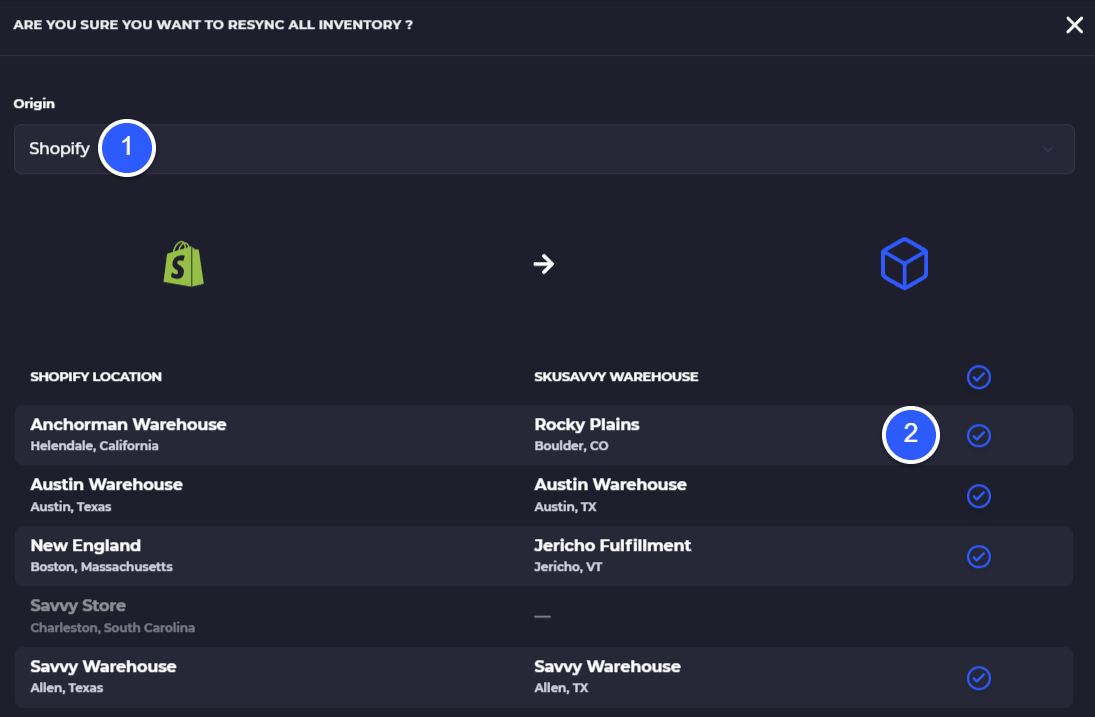
1) Select the origin for the inventory source of truth. These numbers will be used to override the other system numbers
2) Select the locations you want to resync
Shopify Inventory Locations
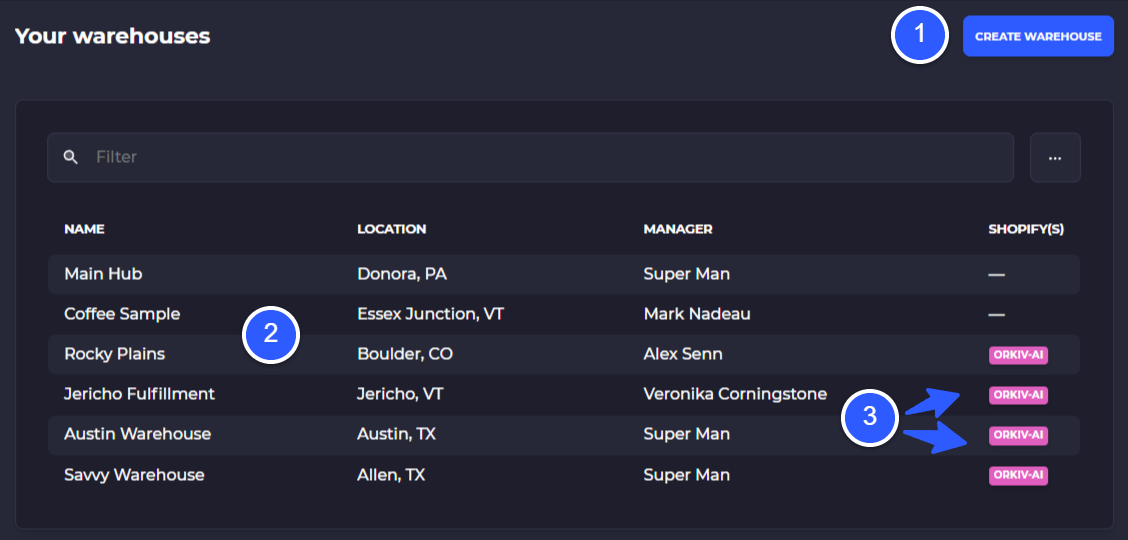
Once connected each of the locations you have within your Shopify account will create a 'Warehouse' within your SKUSavvy account. Inventory that is currently tracked within Shopify at this location will now show within your SKUSavvy account, although it is not available until put-away into a bin.
If you are using Shopify custom fulfillment and hold stock at these locations, these will also show up within your SKUSavvy account, though they will not contain an address since Shopify does not provide this.
1) Create a new warehouse which can be connected with a new Shopify location as well.
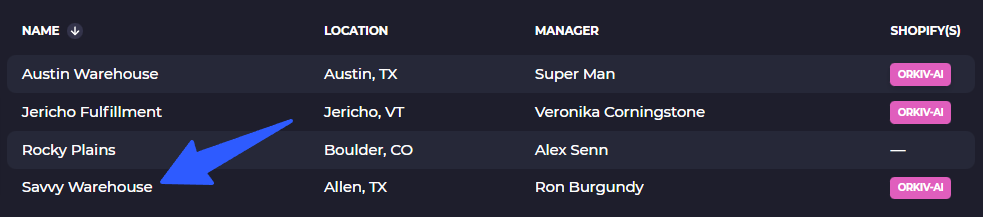
Warehouse locations in SKUSavvy
2) Indicator to tell which locations are connected and which store they are connected to
Sync a New Location
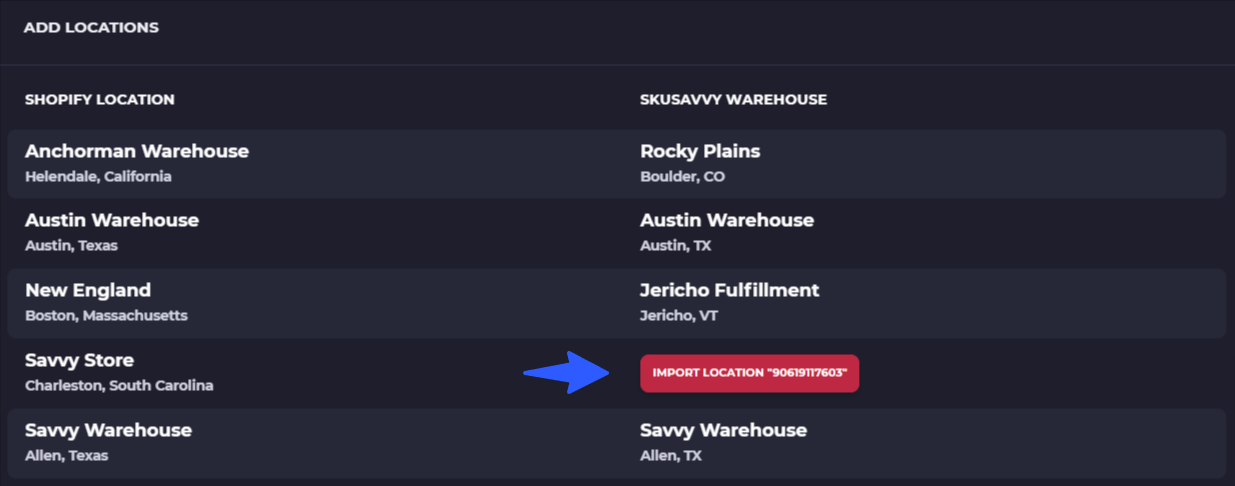
Using the location sync feature you can bring over and connect new locations added within Shopify to your warehouses in SKUSavvy. To do so, simply head over to the Shopify connection within SKUSavvy and find the store you want to add the new location from, then tap on 'Add Locations'.
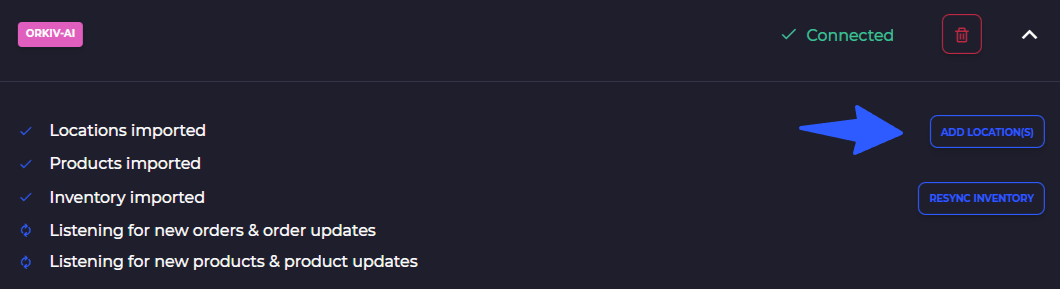
Select Location to Import
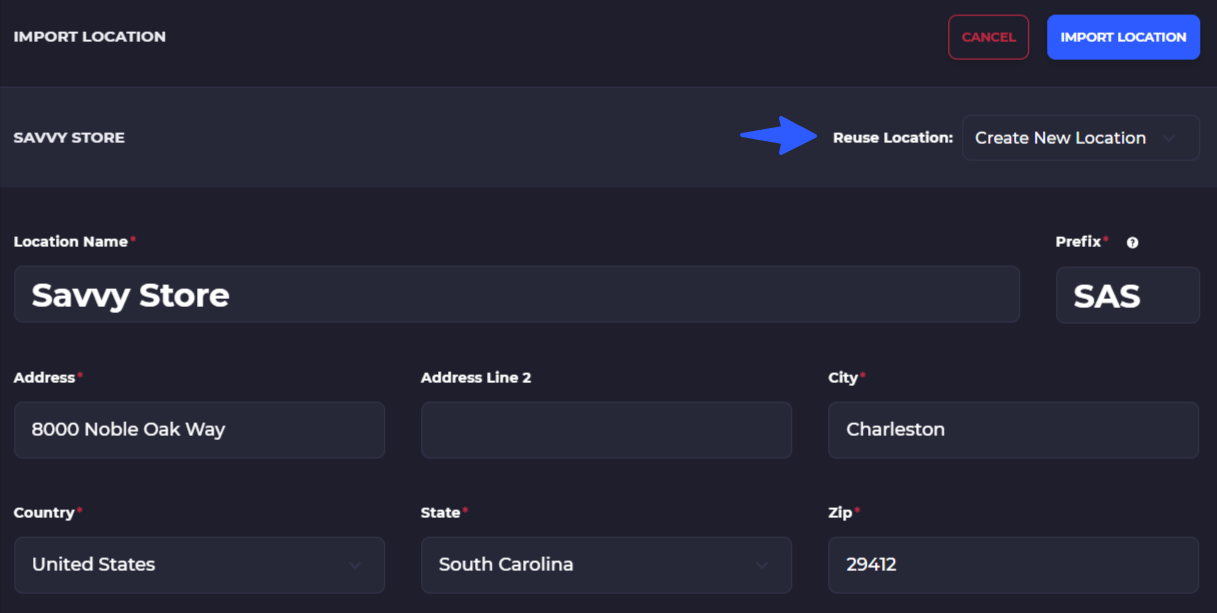
Connect a SKUSavvy Warehouse or Create a New One
Shopify Inventory Allocation
Now that you have Shopify locations and inventory flowing into SKUSavvy it's time to allocate the inventory quantity to bin locations on the visual warehouse manager.
The reason to allocate inventory to bin locations within SKUSavvy is so that you will know exactly where inventory is held within the warehouse. This is used for search purposes as well as during the picking process to pick orders faster.
Note
If you haven't created a warehouse layout yet, this should come before inventory allocation
Step 1: Click the warehouse location you want to allocate inventory
Step 2: Select Inventory for that Warehouse
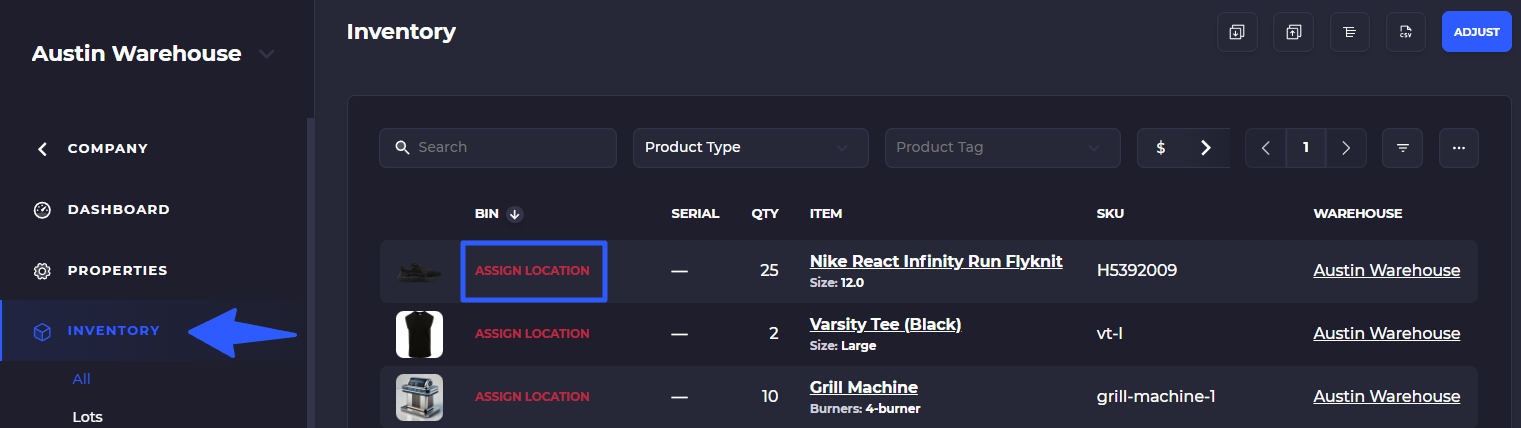
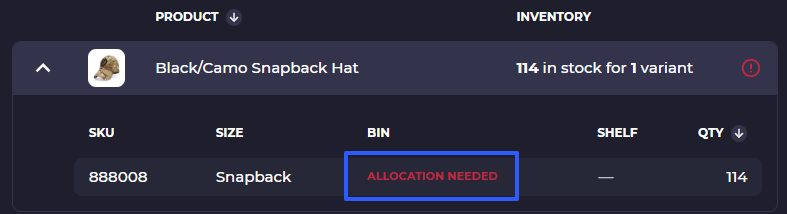
Step 3: Open Inventory Item and Click 'Allocation Needed'
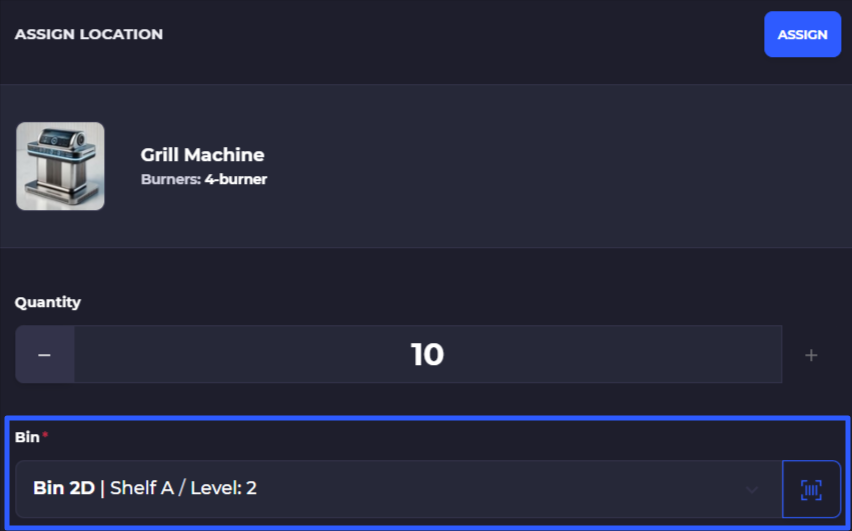
Step 4: Select a Bin Location and Quantity to Allocate
If you haven't created a warehouse layout, you'll want to do this ahead of your inventory allocation
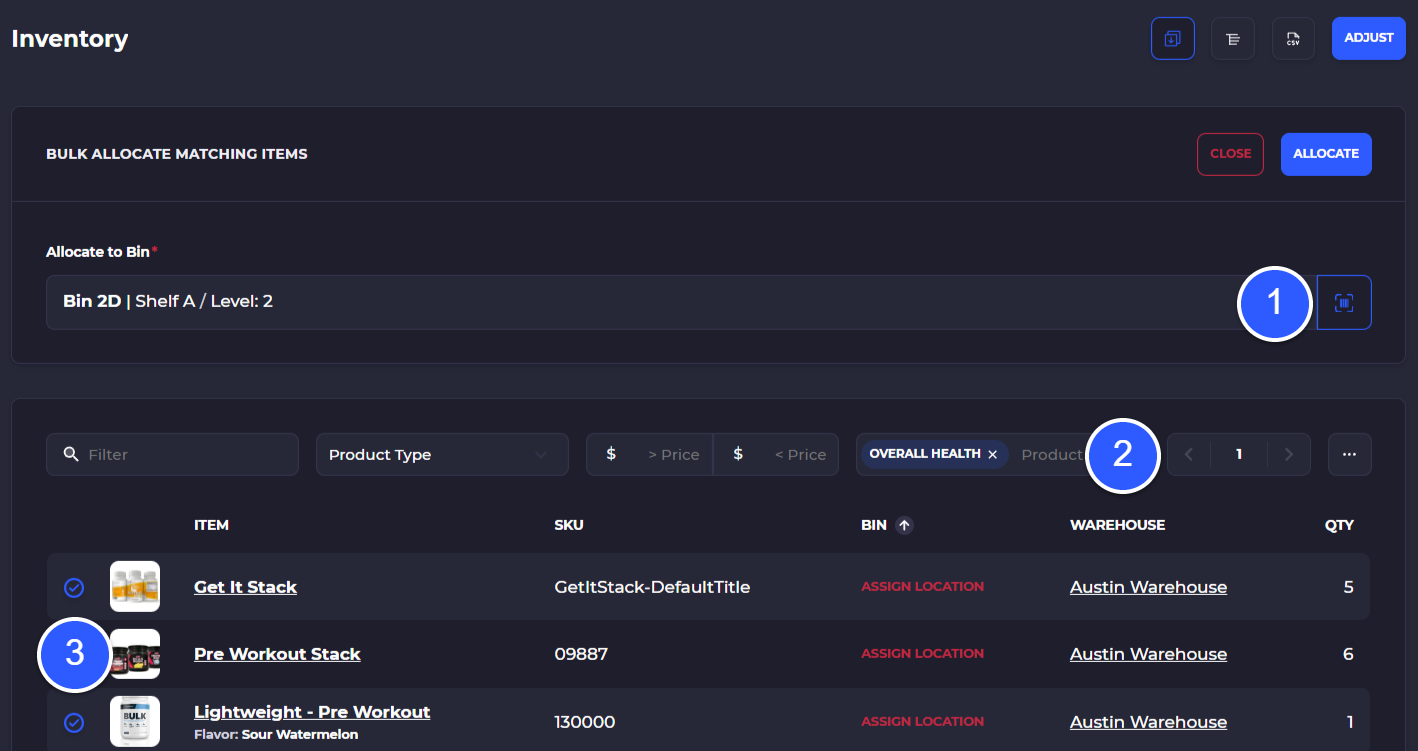
Bulk Allocate Stock
From within the inventory view in a warehouse you can bulk allocate inventory that has come over from Shopify. Simply select the bulk allocation tool, filters products you want to allocate, and select a bin for the stock.
Note this is only available for Shopify inventory that has not been placed in a bin yet
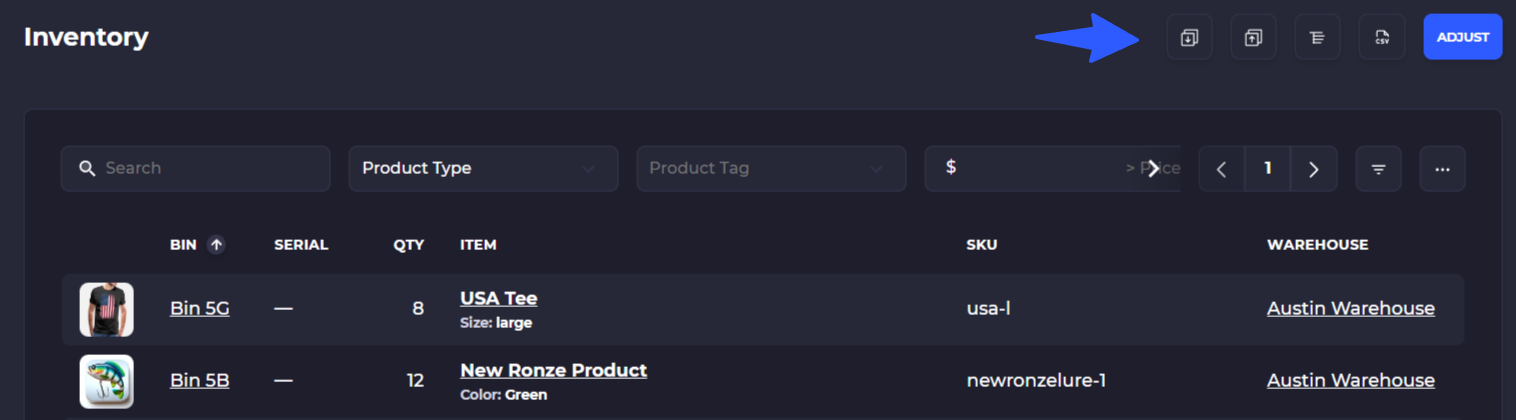
1) Select or scan a bin to allocate inventory from selected items in bulk
2) Filter items you want to allocate, you can combine multiple filters from a search, product type, product tags, price
3) Uncheck an item to remove it from the bulk allocation list
4) Click ALLOCATE
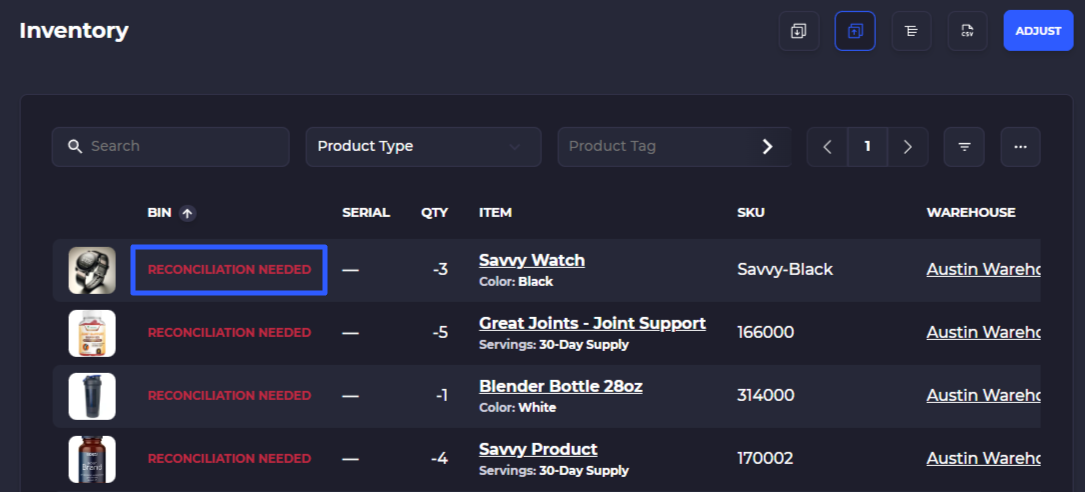
Inventory Reconciliation
Something that may happen once you've connected your Shopify store to SKUSavvy, is that you end up seeing a negative inventory quantity for your items
This happens when you've connected Shopify and you fulfilled orders outside of SKUSavvy
SKUSavvy is looking for the bin location and quantity of the inventory that was taken to fulfill the order externally
When you reconcile the record, you match up where the inventory was taken from within your physical location to fulfill the order
Warehouse > Inventory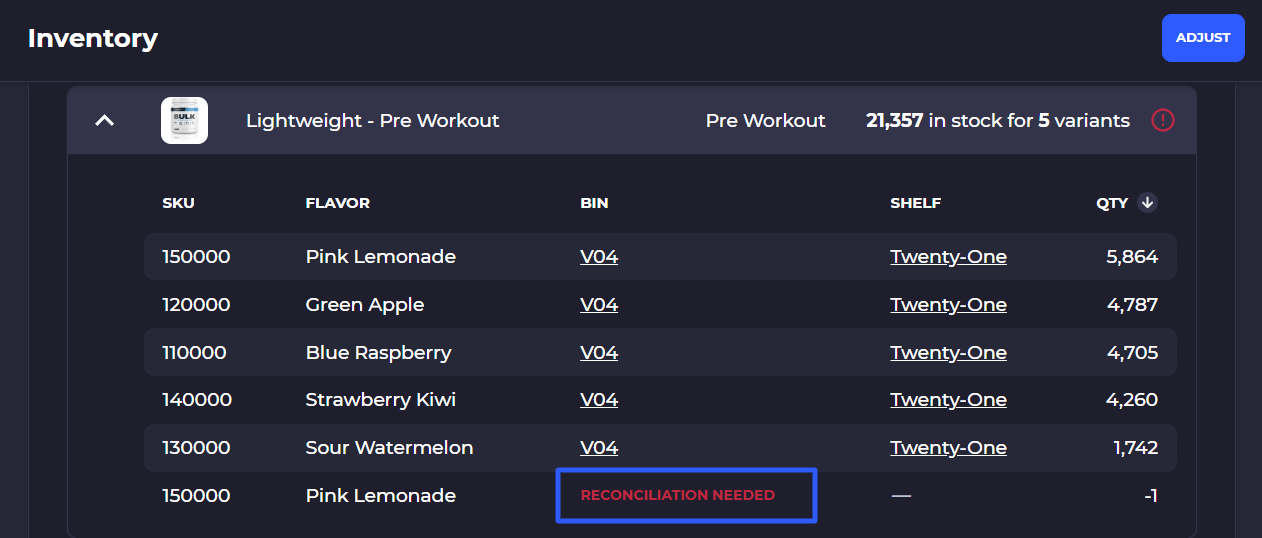
NOTE: you must already have inventory allocated to another bin location in your warehouse to reconcile the record since the inventory must come from a bin location within your warehouse
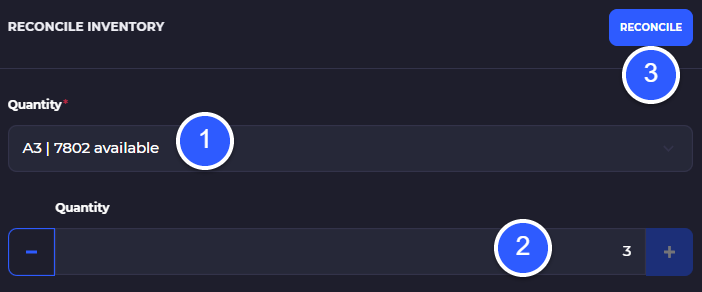
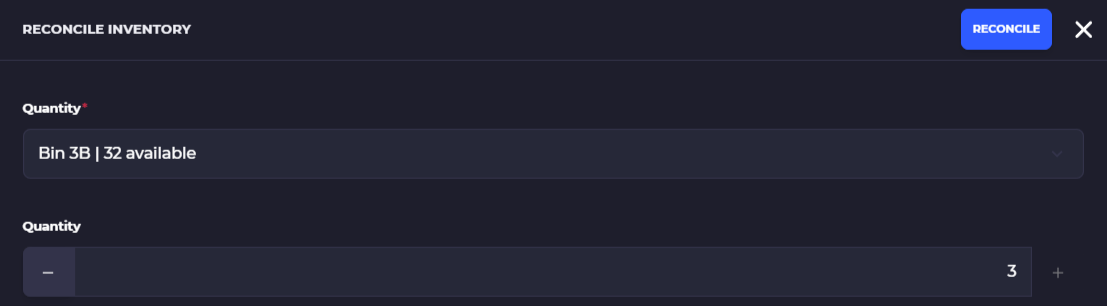
Click the red 'Reconciliation Needed' then:
1) Select another bin already ccontaining this item to take the inventory quantity from
2) Select the quantity to take from this bin (can be split across several bins)
3) Finalize the reconciliation
Bulk Reconcile Stock
You can also bulk reconcile stock to ensure all your stock is always accurate. For reference reconciliations happen when you fulfill stock externally to SKUSavvy, and when that stock has more than one bin location SKUSavvy creates a reconciliation record to determine where the stock came from.
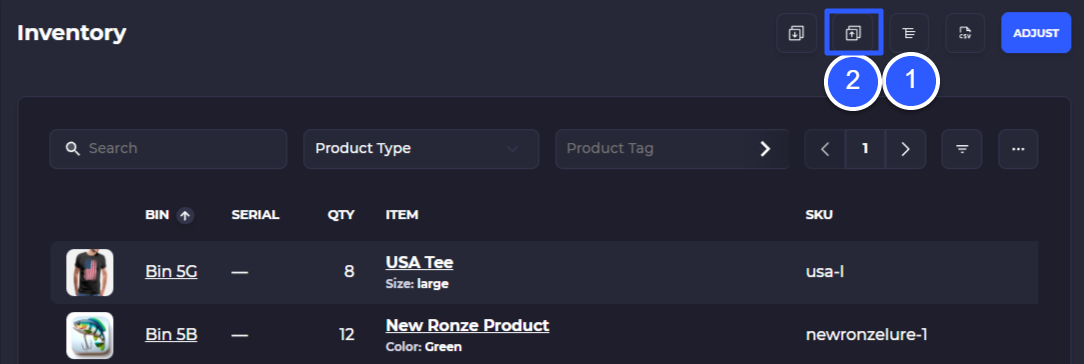
1) Select the flattened list view
2) Choose bulk reconciliation
Select a bin to reconcile stock from. If no bin exists you can choose to delete the reconciliation or add stock to cover the reconciliation for full transparency.
Inventory Guides
Ad-Hoc Inventory Adjustments
Learn how to adjust your inventory and move inventory between bin locations.
Bin-to-Bin Inventory Movements
Learn how to move your inventory between two bin locations using barcode scanning.